Leather is both a beautiful and practical material to make crafts with. Still, many people feel limited by the perception that they need nothing less than an industrial sewing machine to make it work. Luckily, this is not the case, and you can just as well sew leather by hand for beautiful crafts with a homemade touch. With an abundance of leather to buy online, allow us to provide you with the ultimate guide to sewing leather by hand.
Assembling a Sewing Kit
Before you start, assemble all the tools you’ll need into your sewing kit. Sewing leather by hand, in particular, requires an abundance of tools that may feel overwhelming initially, but many items that will be helpful are things you may already have in your home. For example, a very basic leather sewing kit may include the following:
- Two needles
- Waxed thread
- Small clamps/binder clips
- A sewing awl
- Rubber cement
- A stitch groover
- A stitching chisel
That said, there are some specifics you should know regarding needles, waxed thread, and sewing awls.
Leather Sewing Needles
Different applications and materials call for different styles and sizes of needles. Leather, specifically, can be a bit thicker, and you’ll gauge the thickness by ounce measurement, a measurement other materials don’t use.
For example, a 4 oz piece of leather will be 1/16” thick (each ounce is approximately 1/64″), and you can get away with using glover’s needles (sharp, pointed needles) that will directly penetrate the leather. This allows for quick, efficient sewing with simple nylon or polyester threads.
However, thicker leather materials, like an eight-ounce piece, will be 1/8” thick, which will instead either require the use of round or tri point needles with machine, or a blunt needle such as a harness needle that goes through pre-punched sections of the leather. Waxed threads often get used for thicker leathers for better tension.
Waxed Thread
Waxed thread is incredibly helpful; many would consider it essential for leatherworking. Waxed thread is stiffer, stretches less, and is more resistant to water or mildew. If your thread is not already waxed, you can do it yourself using candle wax or beeswax and pulling the thread between your thumb and index finger a few times. This will create friction that will make applying the wax to the thread easier and prolong the thread’s lifespan.
Leather Sewing Awl
An awl is a sharp, pointed tool that makes holes in the material so it can be sewn, making it one of the essential tools in your kit. For leatherworking, you can also use a stitching chisel, which features multiple prongs joined at the top by a metal shaft. This creates multiple holes at once that are perfectly and consistently spaced apart.
Leather Adhesive
For stitching and sewing leather, you need to use rubber cement as your adhesive of choice, if you use adhesive at all. Rubber cement is very effective at holding the leather together as you sew while still being a light enough bond that you have a second chance if you aren’t quite precise enough the first time. You should apply a light coat of rubber cement to each piece of leather and then press them together once the rubber cement is nearly dry. Then after some time, the rubber cement loses its stick, unlike regular contact cement.
Preparing Your Leather
Preparing leather is the next step in the ultimate guide to sewing leather by hand. Preparing your leather for stitching is just as crucial as the stitching process. You should note that leather can contain a lot of inconsistencies or abnormalities that may make the process more difficult. Still, at the same time, it is what makes leather so unique and highly valued appearance-wise.
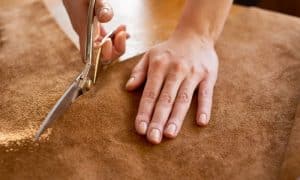
You want to be precise when cutting your leather, so it’s a good idea to lay out your pieces to ensure your pattern pieces fit your designs.
Naturally, thin leather is more ideal than thick leather when sewing by hand, but both are equally possible with proper careful preparation. You can use thin, soft skins like lambskin leather without ever having to touch an industrial sewing machine, whereas thicker pieces may still require machinery, even if you’re trying to do as much by hand as possible.
When working with leather, it may surprise you to find it challenging to keep the leather pieces from slipping. This is where binder clips come in handy, especially when you keep the smooth and rough sides together to create a bit of friction.
Stitching Leather
There are a few different types of stitching you’ll want to consider for your project, but first, you must make the holes. The holes in the leather must be evenly spaced from the edge; for that, a stitch groover acts as a handy guidance tool. The stitch groover will make a guided impression on the leather that you can easily refer to and follow for consistent hole placement.
As for stitching, the most common stitch for hand-sewing leather is the saddle stitching technique. Unlike a straight stitch that shows every other stitch, the saddle stitch fills both sides of every stitch to create a single unbroken line – much like a stitch you’d see a sewing machine make. This technique is the most popular for leather because even if one thread breaks, there’s another to keep the leather from falling apart.
Two other techniques are the single-needle method, better known as a lockstitch, and a double-needle method, which achieves two perfectly stitched lines with one row of stitching.
Concluding Thoughts
There are many tools, leather types, and projects you can try out and experiment with, so don’t shy away from trying new things. If you’re just getting started, we highly recommend looking for scrap leather at first, as these leftover pieces are much cheaper and thus ideal for practicing with until you’re confident using higher quality materials. For more guidance on leather materials and how to sew them by hand, you can always reach out to us at Montana Leather Company, where our experts will be happy to provide further insight and recommendations. Shop with us today and get started on honing your craft!


You must be logged in to post a comment.