No products in the cart.
Return to shopHow to Make a Leather Belt

Getting Started
Making a leather belt is one of the easiest leather craft projects you can do. If you’re reading this now and wondering whether or not you have the ability to make one, stop wondering and rest assured that you can. It really is that easy. And when you’ve finished, you will have a wonderful sense of accomplishment along with newfound knowledge to take your leather crafting skills to the next level. So, let’s get started.
What do I need for leather belt making?
At Montana Leather Company, we offer everything you will need to make a professional quality leather belt. From dyes to punches to premium Hermann Oak leather belt straps, we have you covered. Your shopping list is as follows:
- A Hermann Oak leather belt blank (1 1/4″, 1 1/2″ or 1 3/4″ are recommended)
- A 4 oz bottle of Fiebing’s dye (most color options) or pro dye (best color steadfastness)
- A 4 oz bottle of Fiebing’s Resolene
- A glycerine saddle soap bar *
- Some wool daubers
- A revolving punch
- Your choice of a round strap end punch or pointed strap end punch (the size should match the width of your belt blank) *
- A 1 1/4″, 1 3/8″ or 1 1/2″ oblong punch *
- A mallet *
- A bissonnette edge beveler (recommended size of either 1, 2 or 3) *
- Either a brass or stainless steel roller buckle (the size should match the width of your belt blank)
- A package of brass or nickel 1/4″ Chicago screws (the color should match your buckle choice)
- And lastly, a leather loop (the size should match the width of your belt blank)
* These items are not essential to making a functional leather belt, but if you want to invest in the materials and make a professional grade leather belt, they are certainly recommended.
Cut Your Belt Blank to Size
First, you need to cut your belt blank to the desired length. You may know your waist size already, but if you don’t, simply take a tape measure and record the size of your waist. Now, if your waist size is 36″, add 9″ (for a total of 45″ in this case), and that will be the point where you want to cut your belt.
Method 1) Mark your belt with a pen or pencil where the tip needs to be, and place the round or pointed strap end punch at that point. Take the mallet and hit the punch until it fully pierces the leather.
Method 2) If you don’t want to spend the extra money on a strap end punch, there are certainly other ways to get that “strap end” look on your belt. For a rounded end, you can use a pop can and trace the edge onto your belt, which you can then cut using any sharp blade in your house. For a pointed end, you can trace the end of another belt in the house onto your blank and then cut that out.
After you have cut the end strap on your belt, you may discard the smaller piece or save it as scrap for another project.
Important note: This is now the point where you would use stamping tools or a swivel knife to add an artistic, personal touch to your leather belt besides simply dyeing it. Many of you may not be familiar with stamping or carving leather, but for those of you who are, go ahead and have at it before moving on to the next step.
Mark and Punch the Holes
Next, grab a ruler and a pen or pencil and make a small mark, 6″ away from the tip of the belt. Then mark another two spots on either side of the initial mark, each 1″ apart, for a total of five marks. These will be the holes for the tongue of the belt buckle.
Once your marks are in place, you can take a revolving punch or drive punch and punch holes of at least 3/16″ diameter out of the five marks on the belt.
Next, the slot for the buckle needs to get punched. To do this, take a pen and make a mark 3″ in from the flat end of the belt, this will be the center of the oblong slot for the buckle. Then you can punch the oblong slot into your belt in one of two ways:
Method 1) Take a 1 1/4″, 1 3/8″ or 1 1/2″ oblong punch and place it parallel to the length of the belt, with the mark you placed in the center. Take a maul or mallet and smack the oblong punch until it fully pierces the leather. Discard the remnant piece.
Method 2) Take your revolving punch and punch out a hole from the mark you made. Then repeatedly punch holes until you have a shape similar to the oblong slot. It takes a minute, but if you don’t want to invest in an oblong punch, it’s a much cheaper method and works just fine.
The last holes we need to punch are the holes for the Chicago screws. To do this, first wet the area on the rough, fleshy side of the oblong buckle slot so that it is both easier to bend and hold in place.
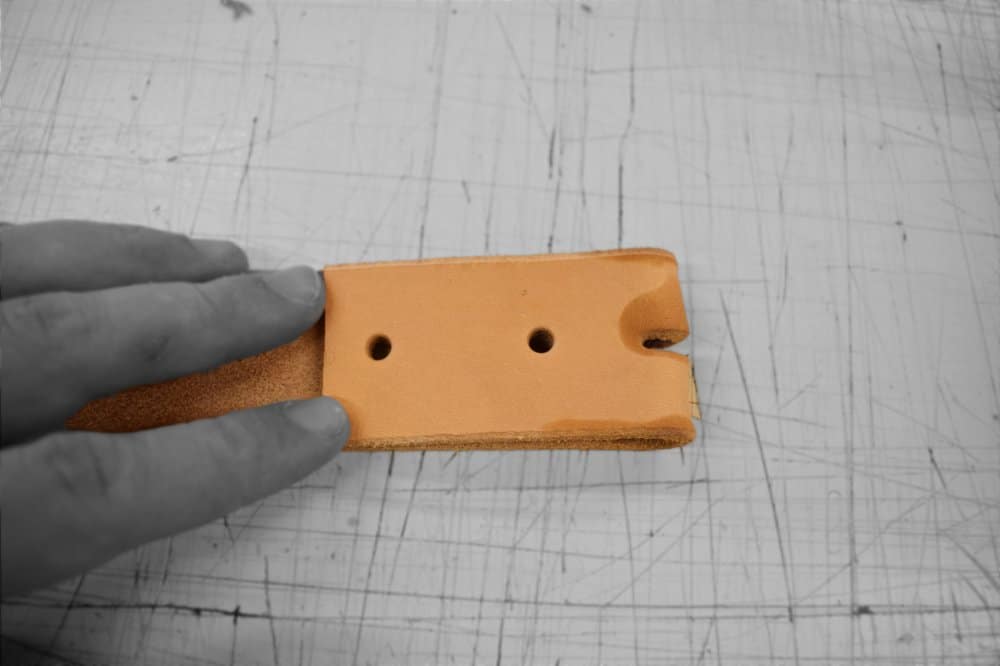
Then fold the leather in such a way that the oblong slot is folded exactly in half. Take your revolving punch and punch two 3/16″ holes through both layers of the doubled leather, about 1 3/8″ apart from each other.
Once you have punched your holes, the result should look something like the photo above. If it does, relax the fold in your belt, and wait a few minutes for the wet areas to dry before moving on to the next step.
Edging the Belt
While this step is not necessary to make a functional leather belt, it is one you probably don’t want to pass up. Take your belt blank and wrap your hand around it. Squeeze gently and notice how sharp the corners of the belt feel to the touch. It’s not painful, but it certainly isn’t pleasant either. To fix this, you do what is called “edge beveling.”
An easy way to do this, especially with first timers, is to use a bissonnette edge beveler (we recommend a size 2 or 3) from Osborne, as it is very easy to use and is quite versatile.
Simply put the hole of the bissonnette beveler along a corner of the belt, and either pull or push it along the full length of the belt. Both the bottom and top portions of the bissonnette beveler are sharp and ready for use, so use it in whichever direction is most comfortable for you. Repeat this for the other three corner edges of the belt until it has a softer, more rounded feel.
Dyeing the Belt
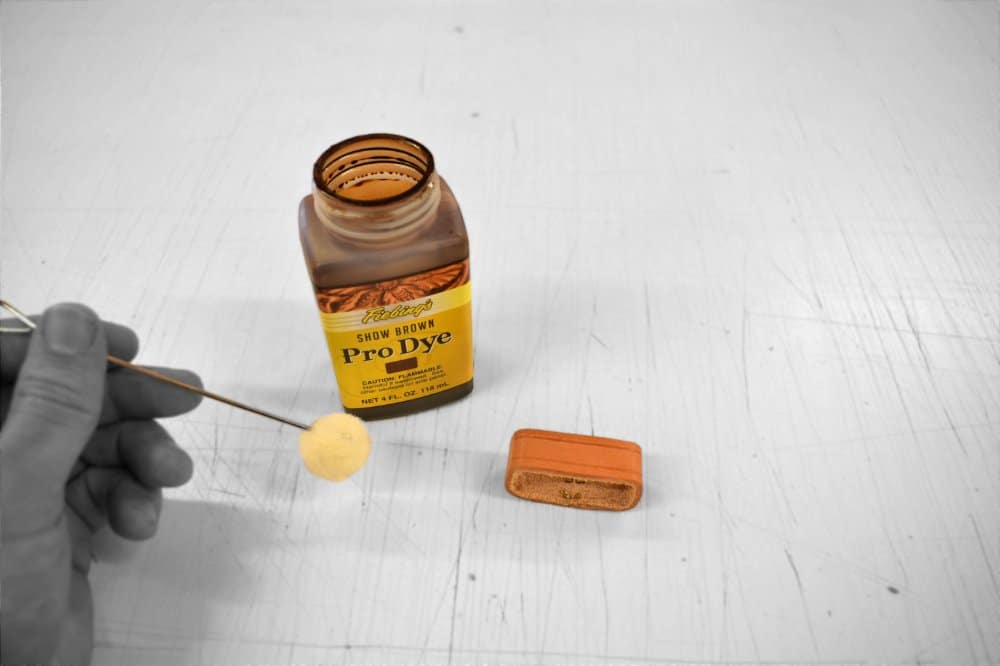
Next, you get to dye the belt whatever color you want it to be. Our regular Fiebing’s dye has a wider variety of color options, but our Fiebing’s pro dye has better color steadfastness, meaning the consistency is better. In this particular how-to, I used Fiebing’s pro dye in show brown.
Dye tends to get messy, so make sure you put some newspaper down, and even put some gloves on, to save yourself a headache from the mess later. Once you’re ready, take a wool dauber and apply a coat of dye to the entire smooth side of the belt blank. Don’t go crazy and have your dye sopping from the dauber, but don’t be afraid of being liberal with your application either. Just try to occupy a happy medium.
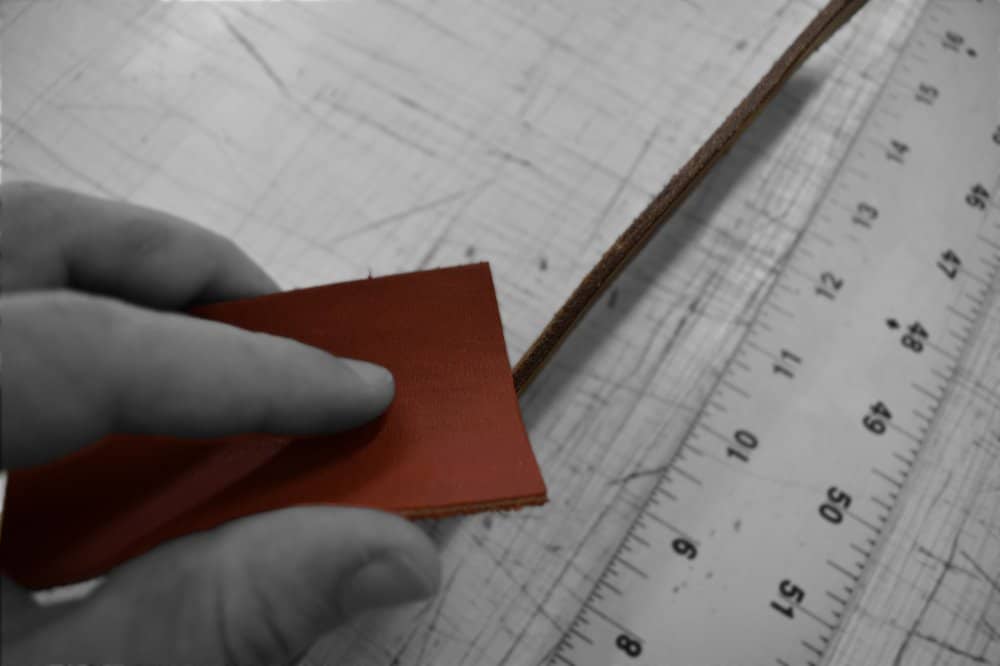
Once you’ve applied your first coat, you’ll notice that the end you started from is starting to dry with some mild streaking. Don’t be disheartened, you just need to apply a second coat, and a third coat even, until your dye is as even as possible along the belt. Then flip the belt over and apply some dye to the flesh side as well, using similar methods until it is to your liking.
Once this is done, apply a bit of dye along the edges of the belt. You shouldn’t be able to see a single speck of natural colored veg tan leather on your leather belt.
Then we need to dye the leather loop as well. Apply a coat or two as needed so the the loop matches the color of your belt.
Buffing the Edges
You may have noticed that the edges and flesh side of your belt are rougher than what you expected. Don’t worry though, we can fix that by smoothing it out with a glycerine saddle soap bar. Cut off a small piece of the glycerine bar and slick the edges slightly with the substance. Don’t apply too much, as it can make your edges excessively waxy. Next, apply some to the flesh side of the belt as well.
Note: This step is not necessary to making a functional belt. But again, if you want to add that professional touch, we recommend that you smooth the edges.
The edges are still a little waxy from the application, so take a piece of leather, denim or cloth, and buff both the edges and the back of the belt where you applied some of the glycerine bar. Quickly brush back and forth until you get a nice, smooth finish.
Apply a Top Finish
Since leather is a material with oils and dyes in it, it is essential to apply a top finish to help protect the leather, making it more durable and long lasting. We recommend that you use Fiebing’s Resolene, as it also provides some waterproofing.
Using a wool dauber, apply a small, even amount of Resolene in a consistent direction, so that you avoid making streaks, which is very easy to do. If you do end up with streaks, give the Resolene a few moments to absorb and settle before you apply another thin coat and try to make it even. Be patient, and apply it as best as you can.
Insert the Hardware
Now for putting all the hardware in. First, put the belt smooth side down, and put the buckle into the oblong slot with the bottom of the buckle facing up. Then put the short end of the belt through the buckle.
Fold and double up the leather again with the buckle inserted. Next, take a brass or nickel Chicago screw and insert the post from the smooth side. It may take some effort, but push it all the way through. Then holding the post in place in the doubled leather, insert the screw into the post using any flathead screwdriver.
Next, let’s put on the leather loop. Starting from the pointed or rounded strap end of the belt, with the staples on the flesh side, slide the loop all the way up the belt, between the doubled leather near the buckle.
With the leather loop in place, take another Chicago screw and insert the post from the smooth side, as fully as it can go. Then, using a flathead screwdriver yet again, insert the screw into the post tightly.
Admire Your Work
And now for that sense of accomplishment. You have just finished making your very own leather belt! It may not be perfect, and you can probably even see where you could have done something differently. But this is the beauty of leather craft! You get better and better each time, until you get to the point where you could even sell your merchandise on the side. In any case, I hope you enjoyed your time crafting your leather belt, and we at Montana Leather Company look forward to sharing more how-to’s with you in the future!


You must be logged in to post a comment.